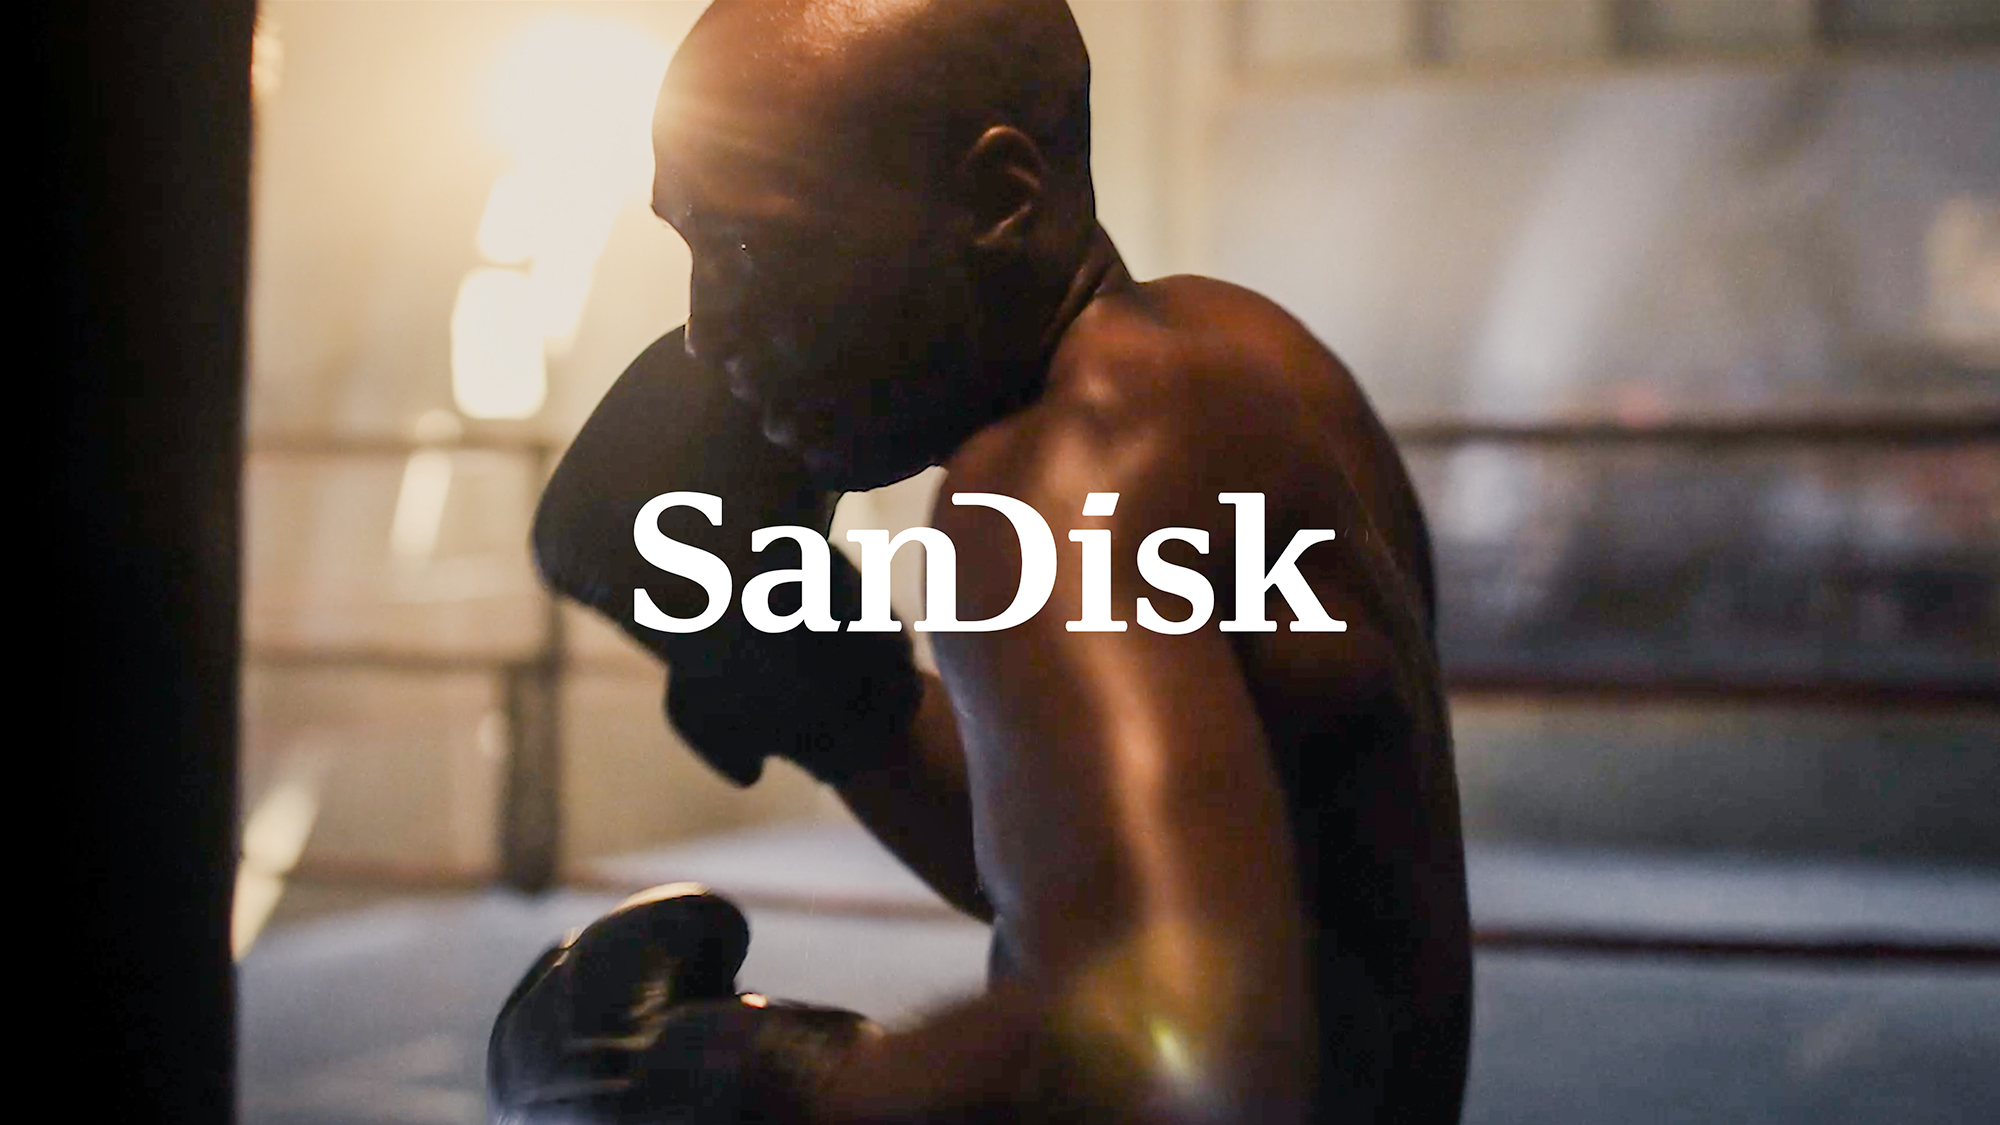
For my latest SanDisk campaign, we had the fun opportunity to create an action sports commercial. Our goal was to showcase the speed and power of SanDisk’s SSDs and...
Read more → For my latest SanDisk campaign, we had the fun opportunity to create an action sports commercial. Our goal was to showcase the speed and power of SanDisk’s SSDs and...
Read more →
I am excited to announce the launch of my new Canon “Path To Mastery” instructional series — Capturing Stories That Matter: Pro Tips for Directors, Cinematographers & Photographers. Please...
Read more →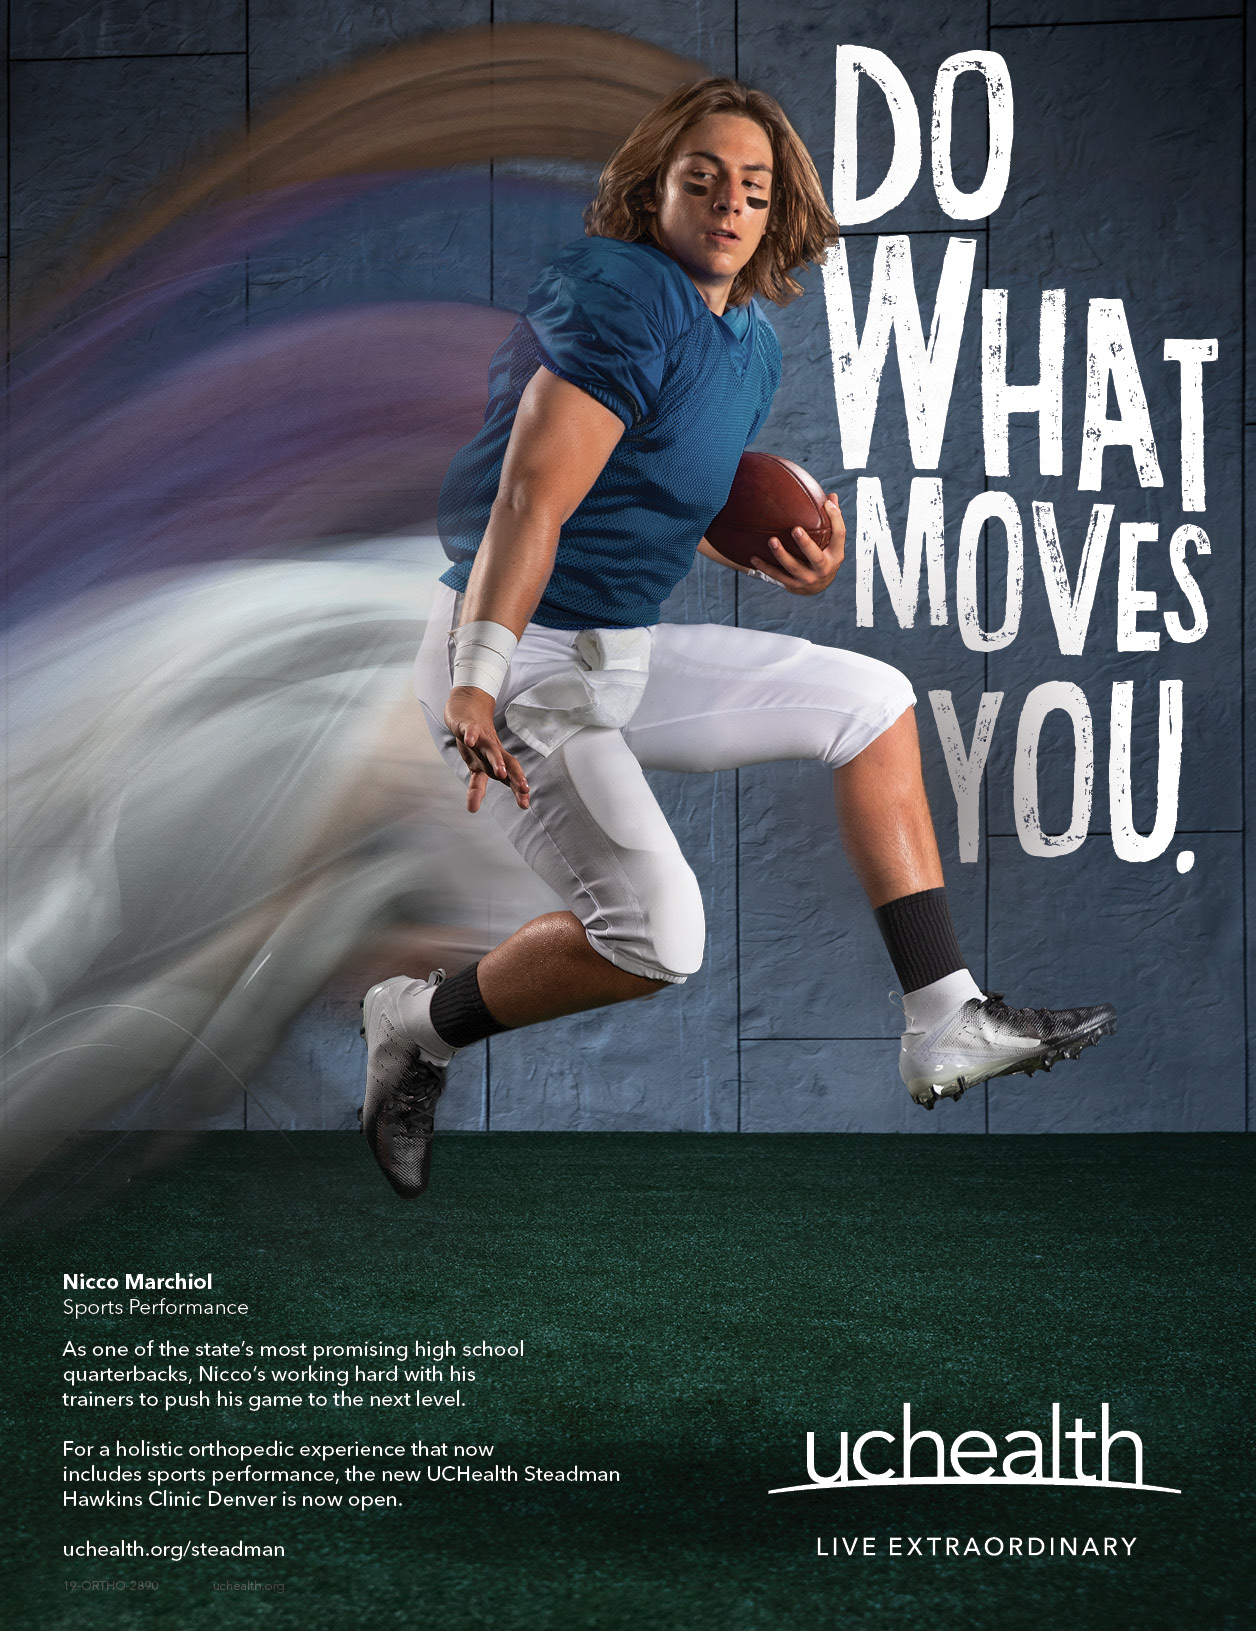
I am excited to share a campaign I shot featuring world-class athletes for the new UCHealth Steadman Hawkins Clinic Denver orthopedic center. One of the highlights was photographing young...
Read more →
I’m happy to announce the launch of my online print shop — and for this month, purchase a print and 100% of the proceeds will go to help children...
Read more →
I had the fun opportunity this month to shoot a Canon campaign to launch their new flagship RF 400mm f/2.8 telephoto lens. Canon is releasing a range of high-end...
Read more →
I was thrilled to learn that my campaign image for Canon’s flagship 1DX Mark III camera won top honors in the 2021 Graphis Photo Annual. I am humbled to...
Read more →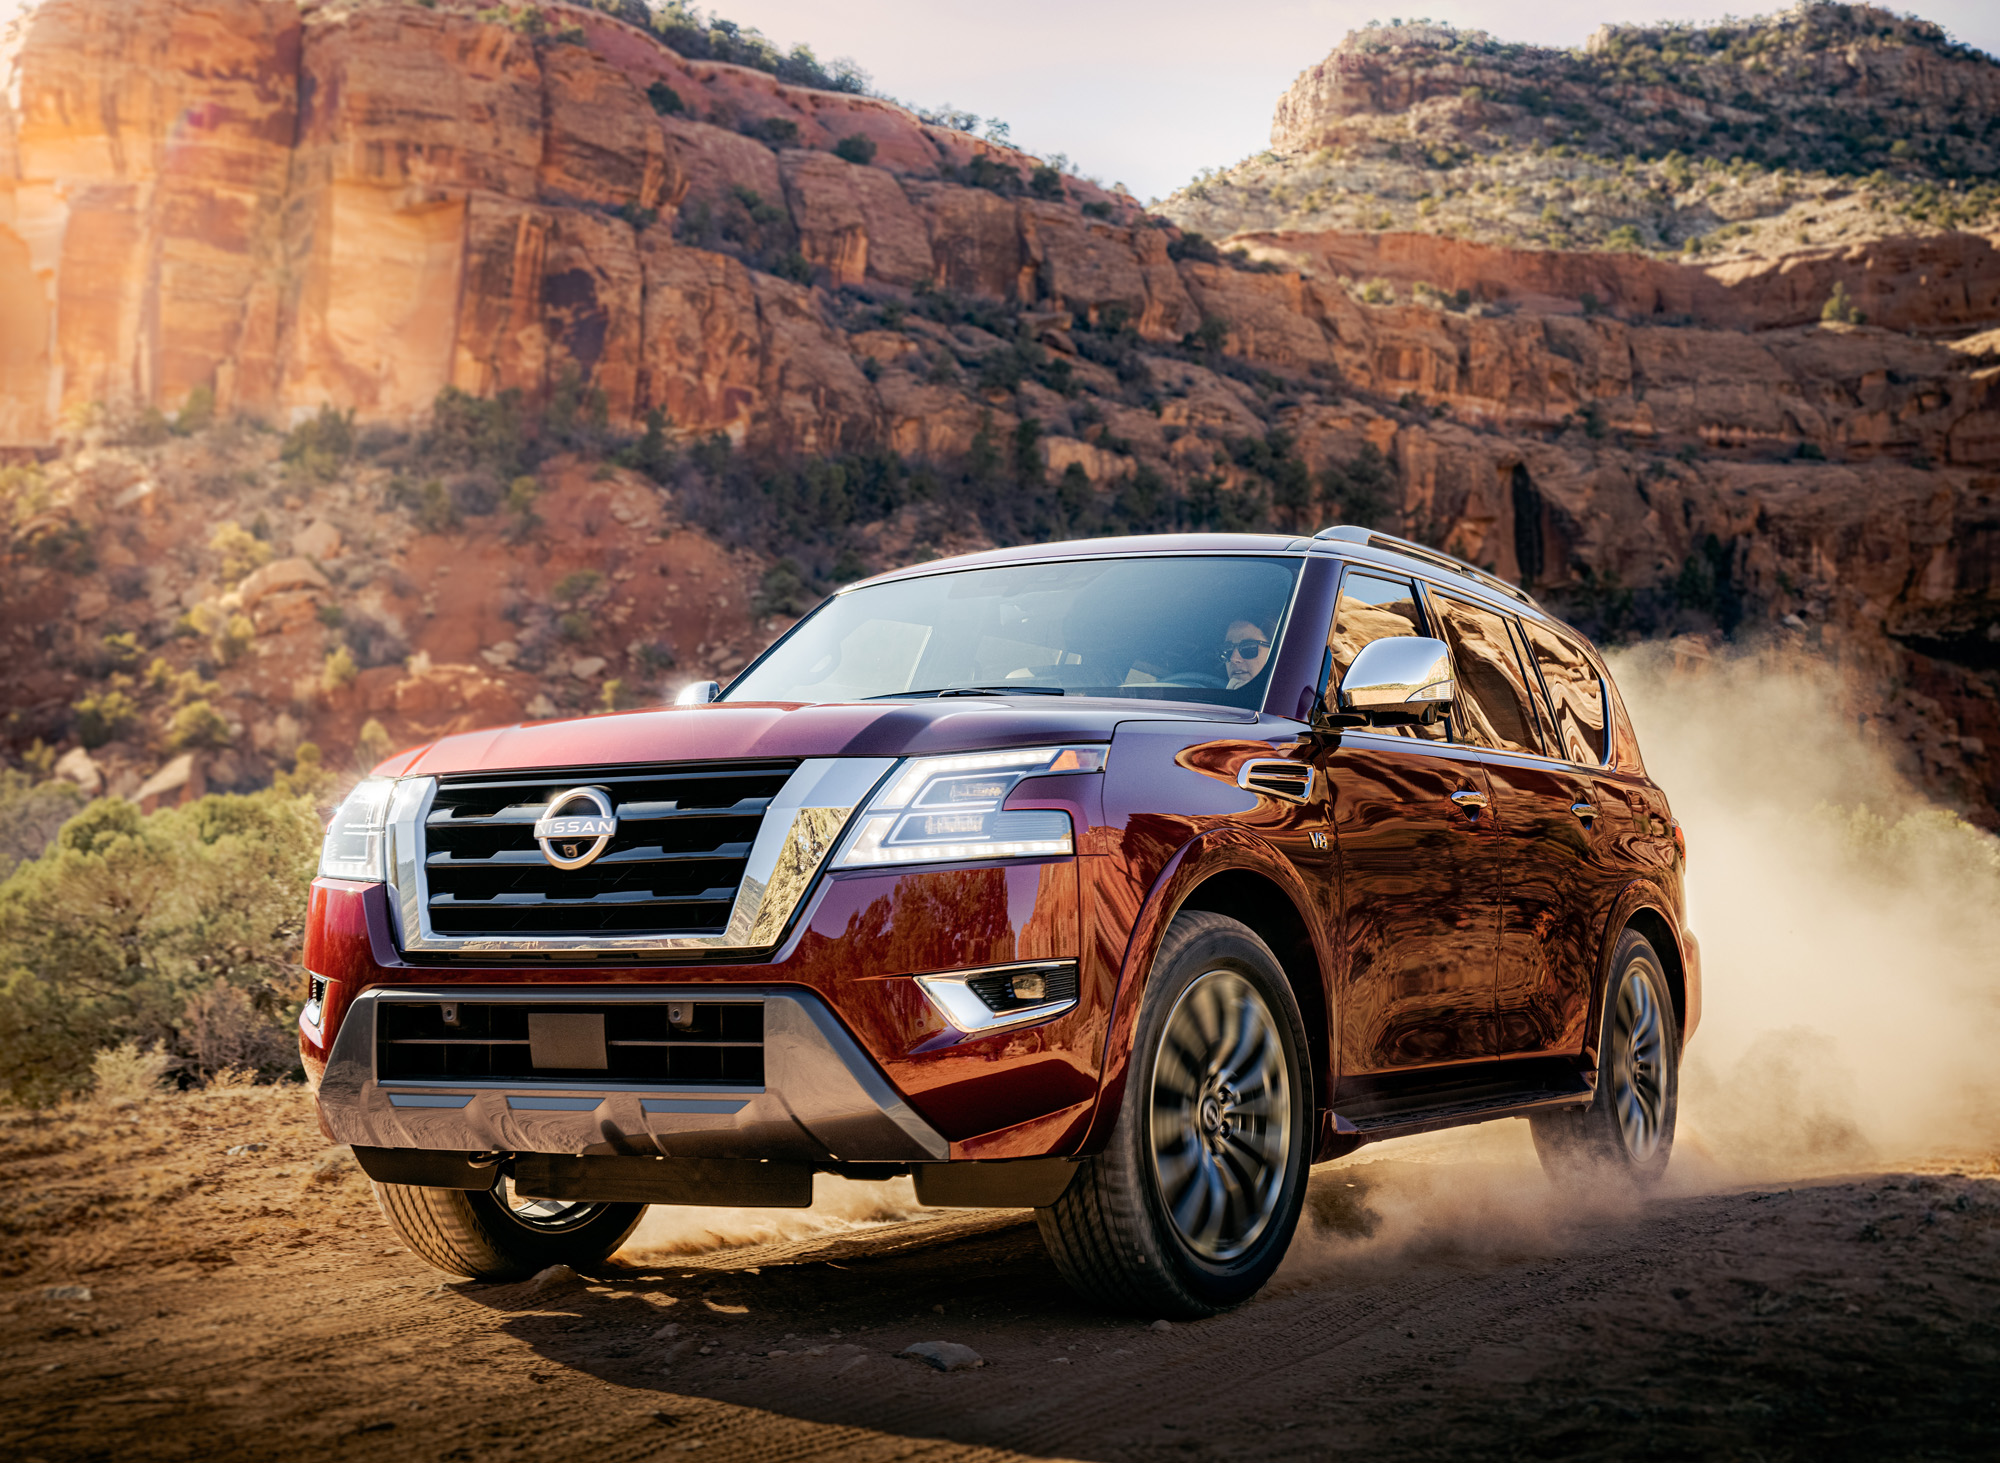
I had the joy of directing and photographing a launch campaign for the 2021 Nissan Armada. It was a blast to capture Nissan’s flagship SUV in a range of...
Read more →
I am excited to share that the CASA campaign I directed has been nominated for an Emmy Award! The Court Appointed Special Advocates For Children (CASA) volunteer program works with...
Read more →